yolo detection 모델을 custom dataset을 이용하여 train 하는 과정을 진행하겠다. yolo를 직접 구현하기엔 노력이 많이 필요한 작업이므로 ultralytics가 제공하는 소스를 통해 학습을 해보자. 윈도우 11 환경에서 진행한다. (리눅스나 기타 OS에서도 크게 다를바 없다. 일부 터미널 명령어 차이만 날 뿐이다.) git과 python이 기본적으로 설치되어있고 환경 변수에 등록해놓도록 하자.
데이터셋을 먼저 구하자. yolo 포맷으로 되어있는 형태가 아니라면 직접 라벨링 해주어야 하므로 잘 찾아보자. 아래의 신호등 데이터셋을 사용한다.
Traffic Signs Dataset in YOLO format
Annotations of bounding boxes in txt files next to every image
www.kaggle.com
다운로드를 받고 압축을 해제하면 다음과 같은 파일들이 있다.

classes.names를 열어보자.
prohibitory
danger
mandatory
other
위와 같이 나와있는데, 순서대로 아웃풋이 0번이면 prohibitory, 1번이면 danger, 2번이면 mandatory, 3번이면 other로 나온다고 보면 된다. 각 표지판의 특성에 따라 라벨링이 따로 된 것이다. 클래스 개수를 의미하는 num_classes(nc) 값이 4인 것. 뒤에서 데이터셋 관련 환경 파일 사용할 때 사용될 정보이므로 잘 기억해두자.
ts 폴더 안에 {index}.jpg, {index}.txt 형태의 한 쌍으로 데이터가 구성되어있다. 해당 인덱스 이미지에서 표지판 위치가 있다면 텍스트 파일에 적는 식으로 되어있다. 이를 참고해서 train, test, valid를 각각 나눠주자. 다음과 같은 폴더 구조로 나누어주면 된다.
train\images,test\images, valid\images: 각각 train, test, valid에 사용될 이미지 파일을 포함한다.
train\labels, test\labels, valid\labels: 각각 train, test, valid에 사용될 텍스트 annotation 파일을 포함한다.
다음 사진을 참고하라.


직접 하나하나 옮겨도 되지만, 귀찮으니 gpt한테 대충 이러한 처리해주는 파이썬 코드 작성해달라했더니 다음과 같이 짜줬다. 참고하시길.
import os
import shutil
import random

# 데이터셋 경로
dataset_dir = 'dataset'  # 데이터셋이 있는 경로
train_dir = 'train'
test_dir = 'test'
valid_dir = 'valid'

# 이미지와 어노테이션 파일 목록 가져오기
image_files = [f for f in os.listdir(dataset_dir) if f.endswith('.jpg')]
annotation_files = [f for f in os.listdir(dataset_dir) if f.endswith('.txt')]

# 이미지와 어노테이션이 같은 파일만 남기기
image_files = [f for f in image_files if f.replace('.jpg', '.txt') in annotation_files]

# 데이터셋을 랜덤하게 섞기
random.shuffle(image_files)

# 데이터를 train, test, valid로 분할
train_split = int(0.8 * len(image_files))
valid_split = int(0.1 * len(image_files))
test_split = len(image_files) - train_split - valid_split

train_images = image_files[:train_split]
valid_images = image_files[train_split:train_split + valid_split]
test_images = image_files[train_split + valid_split:]

# 디렉터리 구조 만들기
for dir_name in [train_dir, test_dir, valid_dir]:
    os.makedirs(os.path.join(dir_name, 'images'), exist_ok=True)
    os.makedirs(os.path.join(dir_name, 'labels'), exist_ok=True)

# 파일 이동 함수
def move_files(files, src_dir, dest_dir):
    for file in files:
        # 이미지와 어노테이션 파일 경로 설정
        image_src = os.path.join(src_dir, file)
        annotation_src = os.path.join(src_dir, file.replace('.jpg', '.txt'))

        # 이미지와 어노테이션 파일을 해당 폴더로 이동
        shutil.copy(image_src, os.path.join(dest_dir, 'images', file))
        shutil.copy(annotation_src, os.path.join(dest_dir, 'labels', file.replace('.jpg', '.txt')))

# 파일 이동
move_files(train_images, dataset_dir, train_dir)
move_files(valid_images, dataset_dir, valid_dir)
move_files(test_images, dataset_dir, test_dir)

print(f"Train, Test, Valid 데이터셋 생성 완료!")
데이터를 나눠놓은 폴더들은 잘 간직해두자. 뒤에서 사용할 것이다.
소스 코드를 가져온다.
# git 저장소로부터 소스를 가져온 후 이동
git clone https://github.com/ultralytics/ultralytics
cd ultralytics

# 하위 패키지 설치
pip install -e .
이후 설정 파일을 복사한다.
# 폴더 생성
mkdir data

# 파일 복사
copy ultralytics\cfg\default.yaml data
copy ultralytics\cfg\models\11\yolo11.yaml data
copy ultralytics\cfg\datasets\coco.yaml data\data.yaml

# 데이터셋 폴더 생성
mkdir data\datasets
# 앞서 분리한 train, test, valid 폴더를 여기에 넣어준다.
# 나의 경우에는 D:\dataset에 분리된 데이터를 저장해두었다.
copy D:\datasets data\datasets
default.yaml: epoch, image size, learning rate, optimizer 등 학습에 사용되는 전반적인 파라미터 값들이 포함된 파일
yolo11.yaml: 모델 크기, 액티베이션 함수 등과 같이 모델의 파라미터를 설정하는 파일
coco.yaml: 데이터셋 관련 설정 파일
만약, yolo v11이 아닌 yolo v8 모델을 사용하고 싶다면, ultralytics\cfg\models\11\yolo11.yaml 대신 ultralytics\cfg\models\v8\yolov8.yaml 이런식으로 수정하면 된다.
이제 설정 파일을 수정한다. 먼저 default.yaml을 다음과 같이 수정한다.
# Ultralytics 🚀 AGPL-3.0 License - https://ultralytics.com/license

# Global configuration YAML with settings and hyperparameters for YOLO training, validation, prediction and export
# For documentation see https://docs.ultralytics.com/usage/cfg/

task: detect # (str) YOLO task, i.e. detect, segment, classify, pose, obb
mode: train # (str) YOLO mode, i.e. train, val, predict, export, track, benchmark

# Train settings -------------------------------------------------------------------------------------------------------
model: D:\ultralytics\data\yolo11.yaml #### 수정. yolo11.yaml 경로를 입력한다.
data: D:\ultralytics\data\dataset.yaml #### 수정. dataset.yaml 경로를 입력한다.
epochs: 100 # (int) number of epochs to train for
...
yolo11.yaml을 다음과 같이 수정한다. 가장 파라미터 수가 적은 n을 살려두고 나머지는 주석처리했다. n<s<m<l<x 순서로 모델이 커지므로 환경에 맞는 적합한 모델 크기를 잘 찾도록 하자.
# Ultralytics 🚀 AGPL-3.0 License - https://ultralytics.com/license

# Ultralytics YOLO11 object detection model with P3/8 - P5/32 outputs
# Model docs: https://docs.ultralytics.com/models/yolo11
# Task docs: https://docs.ultralytics.com/tasks/detect

# Parameters
nc: 4 #### 수정. 데이터 셋의 클래스 개수.
scales: # model compound scaling constants, i.e. 'model=yolo11n.yaml' will call yolo11.yaml with scale 'n'
  # [depth, width, max_channels]
  n: [0.50, 0.25, 1024] # summary: 181 layers, 2624080 parameters, 2624064 gradients, 6.6 GFLOPs
#  s: [0.50, 0.50, 1024] #### 수정. 주석처리.
#  m: [0.50, 1.00, 512] #### 수정. 주석처리.
#  l: [1.00, 1.00, 512] #### 수정. 주석처리.
#  x: [1.00, 1.50, 512] #### 수정. 주석처리.

# YOLO11n backbone
backbone:
...
마지막으로 dataset.yaml을 수정하자. 이건 소스 코드를 전체 복사해서 넣으면 된다. 앞에 dataset에서 봤던 클래스들을 단순히 입력한 것이다.
# Ultralytics 🚀 AGPL-3.0 License - https://ultralytics.com/license

# COCO 2017 dataset https://cocodataset.org by Microsoft
# Documentation: https://docs.ultralytics.com/datasets/detect/coco/
# Example usage: yolo train data=coco.yaml
# parent
# ├── ultralytics
# └── datasets
#     └── coco  ← downloads here (20.1 GB)

# Train/val/test sets as 1) dir: path/to/imgs, 2) file: path/to/imgs.txt, or 3) list: [path/to/imgs1, path/to/imgs2, ..]
train: datasets/train/images
val: datasets/valid/images
test: datasets/test/images

# Classes
names:
  0: prohibitory
  1: danger
  2: mandatory
  3: other
이제 본격적으로 트레이닝을 해보자.
yolo train cfg=data\default.yaml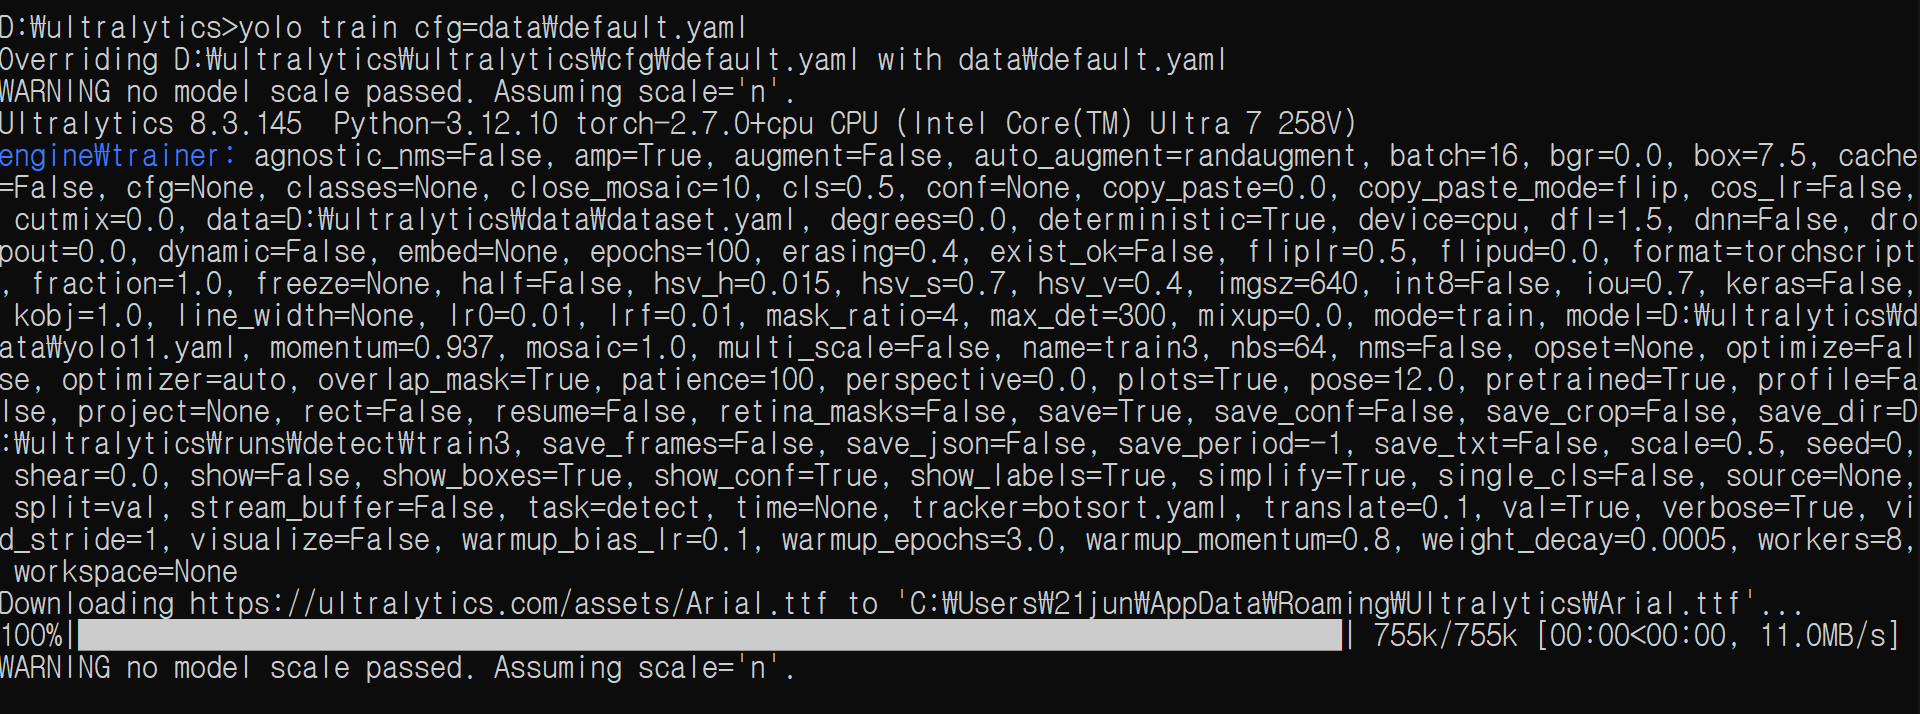

위와 같이 트레이닝이 진행중인걸 확인할 수 있다. 학습 결과물은 runs\detect\train\weights 폴더에 best.pt / last.pt로 저장되어있다. 이름으로 알 수 있듯, best.pt는 가장 성능이 좋은 모델, last.pt는 가장 마지막 모델이다.
best.pt 파일을 이용해서 다음과 같이 모델 파일을 테스트한다. runs\detect\predict 폴더에 이미지가 저장된다.
yolo task=detect mode=predict model=D:\ultralytics\runs\detect\train\weights\best.pt conf=0.25 source="https://images.saymedia-content.com/.image/t_share/MTc1MjY4NzUyNDE2MzE4ODQ2/road-signs-and-meanings-what-if-they-applied-to-real-life-events.jpg" save=True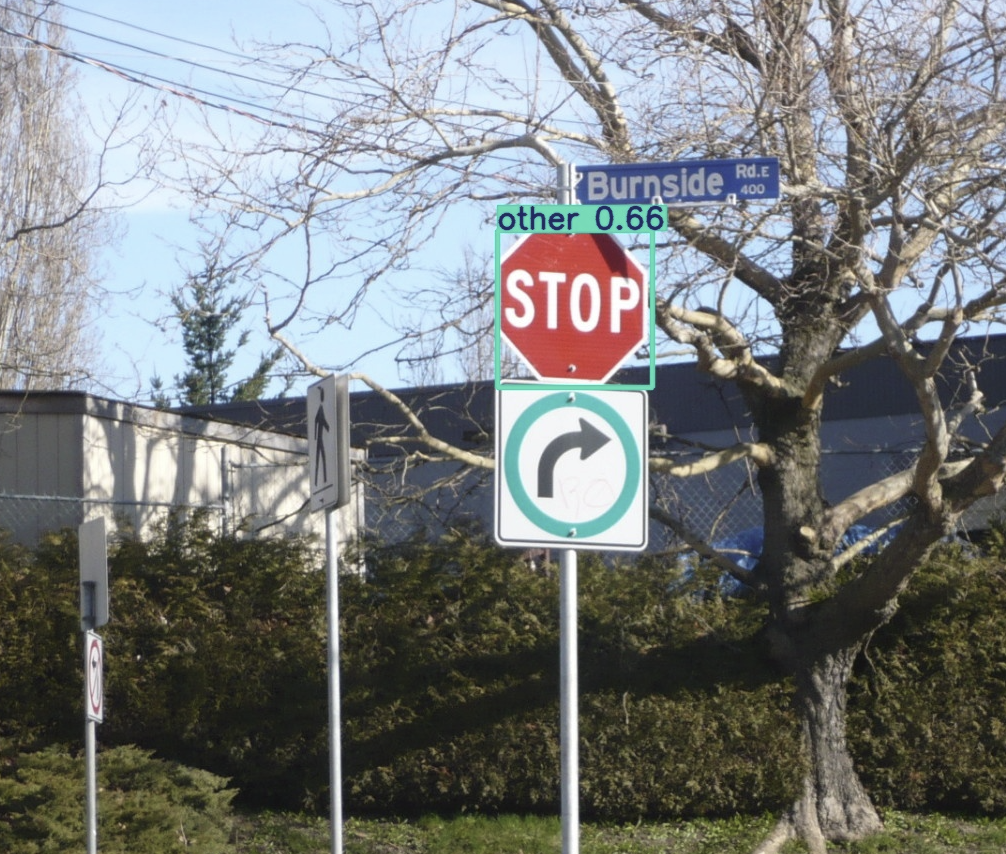
위에 STOP 표지판이 detection 된 것을 확인할 수 있다.
'Deep Learning > 프로젝트' 카테고리의 다른 글
| [3] C# WPF + Pytorch - 마스크 인식 딥러닝 프로젝트: GUI 코드 (9) | 2025.01.06 |
|---|---|
| [2] C# WPF + Pytorch - 마스크 인식 딥러닝 프로젝트: 학습 코드 (12) | 2025.01.06 |
| [1] C# WPF + Pytorch - 마스크 인식 딥러닝 프로젝트: 소개 및 환경 세팅 (10) | 2024.12.31 |


