학습한 웨이트 파일을 윈도우 프로그램에서 추론용으로 사용하고자 한다. 이때, 어떤 추론 프레임워크를 사용하여 배포할 것인지가 상당히 중요하다. 가장 대중적이고 공통으로 쓰일만한 프레임워크는 ONNXRuntime이 있다. openvino나 cuda 같은 다양한 EP(execution providers)도 빌드 시 포함시킬 수 있으며 기존의 텐서플로나 파이토치에서 생성된 웨이트 파일을 onnx 확장자로 변환하는 코드도 구글링하면 많이 나온다.
따라서 이번 포스팅에서는 EP를 제외하고 CPU로만 추론하는 ONNXRuntime C++ 빌드 과정을 살펴본다. (EP 포함한 빌드는 현재 트라이 중인데 오류가 발생하여 나중에 해결되면 올리겠다.)
OS환경은 윈도우 11 24H2이며 IDE는 Visual Studio 2022 Community를 사용한다. 시작 전 다음 프로그램이 설치되어있어야한다.
1. Git 설치 (Version: 2.49.0)
Git - Downloading Package
Download for Windows Click here to download the latest (2.49.0) x64 version of Git for Windows. This is the most recent maintained build. It was released on 2025-03-17. Other Git for Windows downloads Standalone Installer Git for Windows/x64 Setup. Git for
git-scm.com
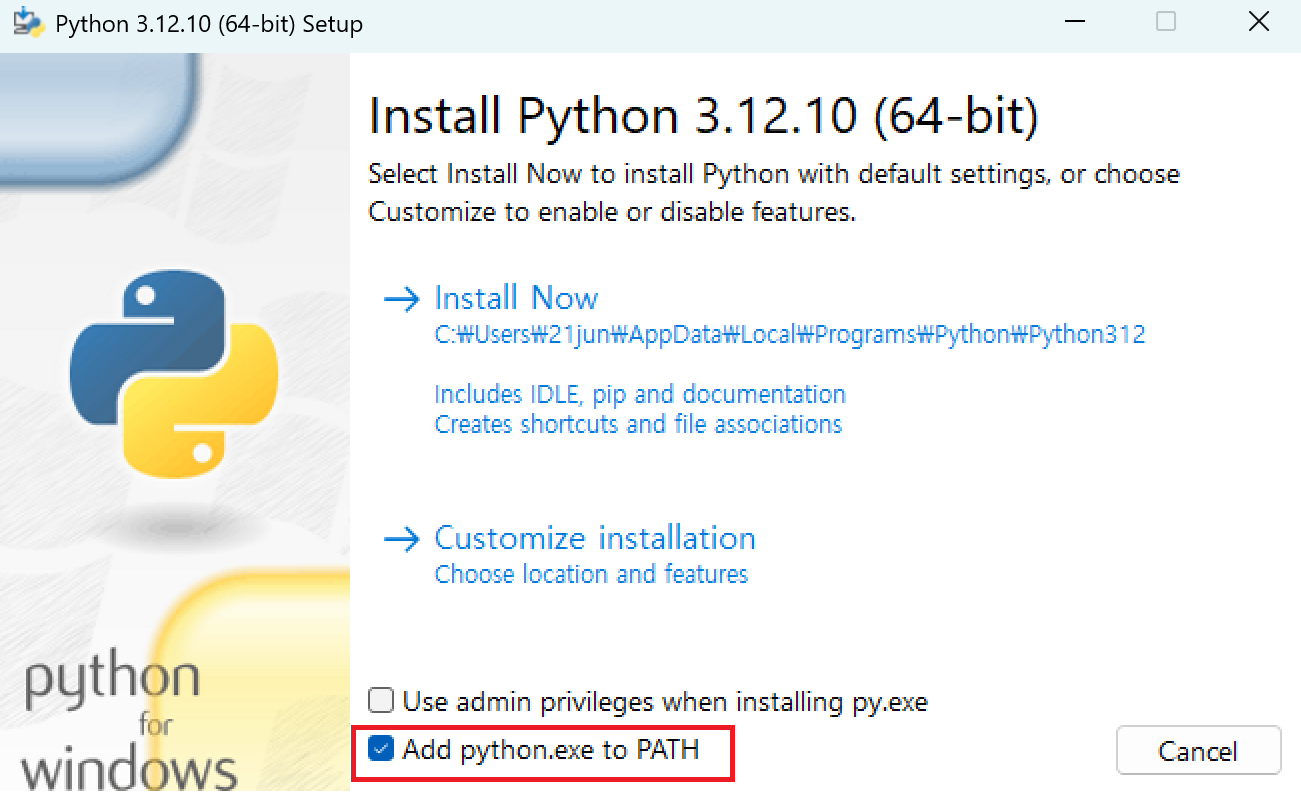
2. Python 설치 (Version: 3.12.10)
Python Release Python 3.12.10
The official home of the Python Programming Language
www.python.org
* 설치 시 아래와 같이 Add python.exe to PATH에 체크를 해주어야 cmd에서 경로 입력없이 python을 호출할 수 있음.
3. CMake 설치 (Version: 3.31.7) - 사이트 들어가면 위에꺼 말고 밑에꺼 다운로드.
Download CMake
You can either download binaries or source code archives for the latest stable or previous release or access the current development (aka nightly) distribution through Git. This software may not be exported in violation of any U.S. export laws or regulatio
cmake.org
* 설치 시 아래와 같이 Add CMake to the PATH environment variable에 체크를 해주어야 cmd에서 경로 입력없이 cmake를 호출할 수 있음.

세팅이 끝났으면 아래와 같이 onnxruntime 소스를 깃 저장소로부터 가져온다. 용량이 커서 시간이 다소 걸린다.
$ git clone --recursive https://github.com/Microsoft/onnxruntime
$ cd onnxruntime
--recursive는 하위 모듈까지 모두 클론하겠다는 의미이다. 꼭 적어주자.

이후, Requirements.txt에 포함된 패키지들을 설치한다.
$ python.exe -m pip install --upgrade pip
$ python -m pip install setuptools
$ pip install -r requirements.txt
다음 명령어를 입력해 빌드를 시작한다. 시간이 오래 걸린다.
$ .\build.bat --config Release --cmake_generator "Visual Studio 17 2022" --parallel --build_shared_lib--config: 빌드 타입을 입력한다. [Debug / Release / RelWithDebInfo 등] Debug에는 디버깅 및 로깅 관련 코드들이 모두 포함되어있어서 속도가 느리다. 반면 Release는 디버깅 관련 코드가 스킵되어있어 빠른 속도로 수행된다. RelWithDebInfo의 경우 Debug와 Release 사이의 중간 타입이라고 보면 된다.
--cmake_generator: cmake 시 출력할 IDE 빌드 툴을 입력한다. 나는 Visual Studio 2022를 사용하므로 Visual Studio 17 2022로 설정했다. [Visual Studio 12 2013 / Visual Studio 14 2015 / Visual Studio 15 2017 / Visual Studio 16 2019 / Visual Studio 17 2022]
이후 [onnxruntime_소스경로]\build\Windows\Release\Release 폴더에 들어가면 많은 파일들이 있는데 그중에서 onnxruntime.lib과 onnxruntime.dll을 사용한다.
실제 C++ 프로젝트에서 라이브러리가 잘 호출되는지 확인해보자. Visual Studio에서 C++ 빈 프로젝트를 생성 후 다음과 같이 프로젝트 설정을 한다.
1. 프로젝트 우클릭 - 속성 - 구성 속성 - C/C++ - 추가 포함 디렉터리 - [onnxruntime_소스경로]\include\onnxruntime 추가.

2. 링커 - 일반 - 추가 라이브러리 디렉터리 - [onnxruntime_소스경로]\build\Windows\Release\Release 추가.

3. 링커 - 입력 - onnxruntime.lib 추가

main.cpp 소스 파일을 추가한 뒤 다음과 같이 테스트 코드를 입력한다. 테스트할 onnx 파일은 기존에 갖고 있던 pytorch나 tensorflow 모델 파일을 onnx로 변환할 수도 있고 ONNX Model Zoo 등 사이트에서 다양한 모델의 onnx 파일을 구할 수도 있다.
#include <iostream>
#include "core/session/onnxruntime_cxx_api.h"
#include <string>

int main() {
    try {
        std::wstring model = L"D:\\yolo11n.onnx";
        Ort::Env env(ORT_LOGGING_LEVEL_WARNING, "test");
        Ort::SessionOptions session_options;
        Ort::Session session(env, model.c_str(), session_options);
        std::cout << "ONNX 모델 로드 성공!" << std::endl;
    }
    catch (const Ort::Exception& e) {
        std::cerr << "에러 발생: " << e.what() << std::endl;
        return 1;
    }
    return 0;
}
결과: ONNX 모델 로드 성공!
'Deep Learning > 환경 세팅' 카테고리의 다른 글
| [딥러닝 환경 세팅] WSL2 환경에서 원격 SSH 코딩 서버 구축하기 (VSCode) (13) | 2023.06.25 |
|---|---|
| [딥러닝 환경 세팅] 윈도우에서 Tensorflow GPU 환경 구성하기 (WSL2, CUDA, Anaconda) (24) | 2023.06.24 |